I set this up so that I can ramble on about my lead (and plastic) mountain, my endless gaming, miniature, and terrain projects, and other

insights into various games.


You'll find lots of 'pretty pictures', various modeling techniques, and hopefully some inspiration for your own lead pile. You're bound to

find something amongst my games and photos that interests you.


Sit back, open a cold one, and enjoy.


If you need something, feel free to contact me at: dglennjr at yah00 dot com


Friday, January 25, 2013

2011, Local Terrain Competition

Since we were bored, I issued a challenge to our group to take a pre-cut wood art's & Craft building and turn it into a 20mm, WWII terrain piece.

Here were the rules:


1st Annual Dragon's Lair Terrain Building Competition

Rules


1. The Model to be used is the pre-cut wood puzzle ‘Villa’ from Creatology. Also included is a 7”x8”


rectangular, 1/8” thick, MDF base.

2. You must use all of the pre-cut wooden pieces to create a 20mm scale building(s), mounted to

the base, and appropriate for WWII, European gaming. (I.E.: France, Germany, Russia, Italy,

and etc.)

3. You are not required to put the model together per the puzzle instructions and may cut the pieces

in various ways. You are encouraged to ‘not’ follow the instructions as included.

4. All terrain must fit on the 7”x8” base provided.

5. You may, and are encouraged to, add any number of terrain details, materials, or textures as you

wish. (I.E.: plaster, card stock, balsa wood, styrene, flocking, rocks, trees, and etc., to name a

few.)


Here is the $1 craft kit.

Cover
 
Wood Sheet #1 

Wood Sheet #2
 
Here is my submission (and a sort of step-by step process):
 
 
German/Italian House (with a Nazi/SS secret inside)
 
Here, I've redrawn the 'new' wall sections to the back of the two sheets of wood provided. (The old walls are die-cut into the sheets, so I had to add some glue to keep all the pieces together.)  Yes, I did not use the wall shapes as provided. (It wasn't against the rules.)
 
 Here is a mock-up of the building using card stock. ("Measure twice, cut once!")

The site actually has two buildings, with the smaller shed structure detachable from the main base.  See below. 

 Here, the walls take shape.

You can see the 'detached portion of the base.  It still makes a 7"x8" base as required. 

The roofs are added for their initial fitting.

Here, the interior is taking shape. It has entries at the lower level and main level, and an upper story. (3 total stories, with removable floors.)  

More details are added. Cereal box is added to the shed for a wood shingle appearance. Corrugated cardboard sheet strips are added to the roof for a 'mediterranean look.'  A foam chimney was cut, and stones carved into it. More cereal box 'squares' are added to the lower level as 'flagstone' paving.
 
Here, the stone steps up to the main level, and the retaining wall are taking shape. (More use of the wood scraps from the original model.)
 
Here we see the 'front' of the house and the main entry and walled entry garden.   

 "shhhh!"
One of the main secrets of the house..a hidden communication & planning room located below the entry.  It is accessible from the interior lower level, from behind an actual sliding bookcase.

Here we see the hillside taking shape around the house. Where'd that secret room disappear to?

Here is the model, primed black and ready for paint.
 
 Here is an aerial (from the bombers?) after paint has been applied.

 Here's the back.
 
 Here's the side (chimney).

 Here's the front.

 Here's the front entrance patio.

 Surprise I tell you...a secret Nazi Communication/Planning room below the house.

 There's a radio system in the corner on a desk, with assorted Hitler pictures and propagansa on the walls.

 The other wall has a bookshelf full of codebooks and etc., as well as another portrait of Hitler.
(It just wouldn't be complete without the details.) 

 The roof is off.  Here's the top level at the top of the stairs. 
There are numerous rugs on the floor.

 The third floor is removed to reveal the main level (2nd floor).  A door goes out to the balcony.  There are a few tapestries and paintings on the various walls.

 The second floor is removed to reveal the lower level (1st floor).
A door goes to the outside, under the balcony.

 On the lower level, here is the bookcase.
(Of course the hidden entrance is located behind the bookcase.)

Here's the hidden entrance to the secret (or not-so-secret anymore) nazi communication/planning room. The bookcase slides to the left under, underneath the stairs.


Japanese/Samurai Era Village-Part 1.

Here I go again.  I've agreed to build another village for a gaming friend. Though, I am getting some good 20mm miniatures in trade.

This time the theme is Feudal Japan and the age of the Samurai.  The task is to create a village in the general style and size for a skirmish war game.

Some Inspirational Pictures:


Here's the Plan:
  • Large House
  • Shinto Temple & Gate
  • Small House
  • Barn
  • Shed
  • Bell Tower (Storm/Danger Warning)
  • Water Well
  • Wood fences & gate(s)
  • Plastered stone walls & gate(s)
  • Rice Field
  • Vegetable Field
  • Bridge
  • ...and possibly more if time permits.
Here are some pictures of the progress.

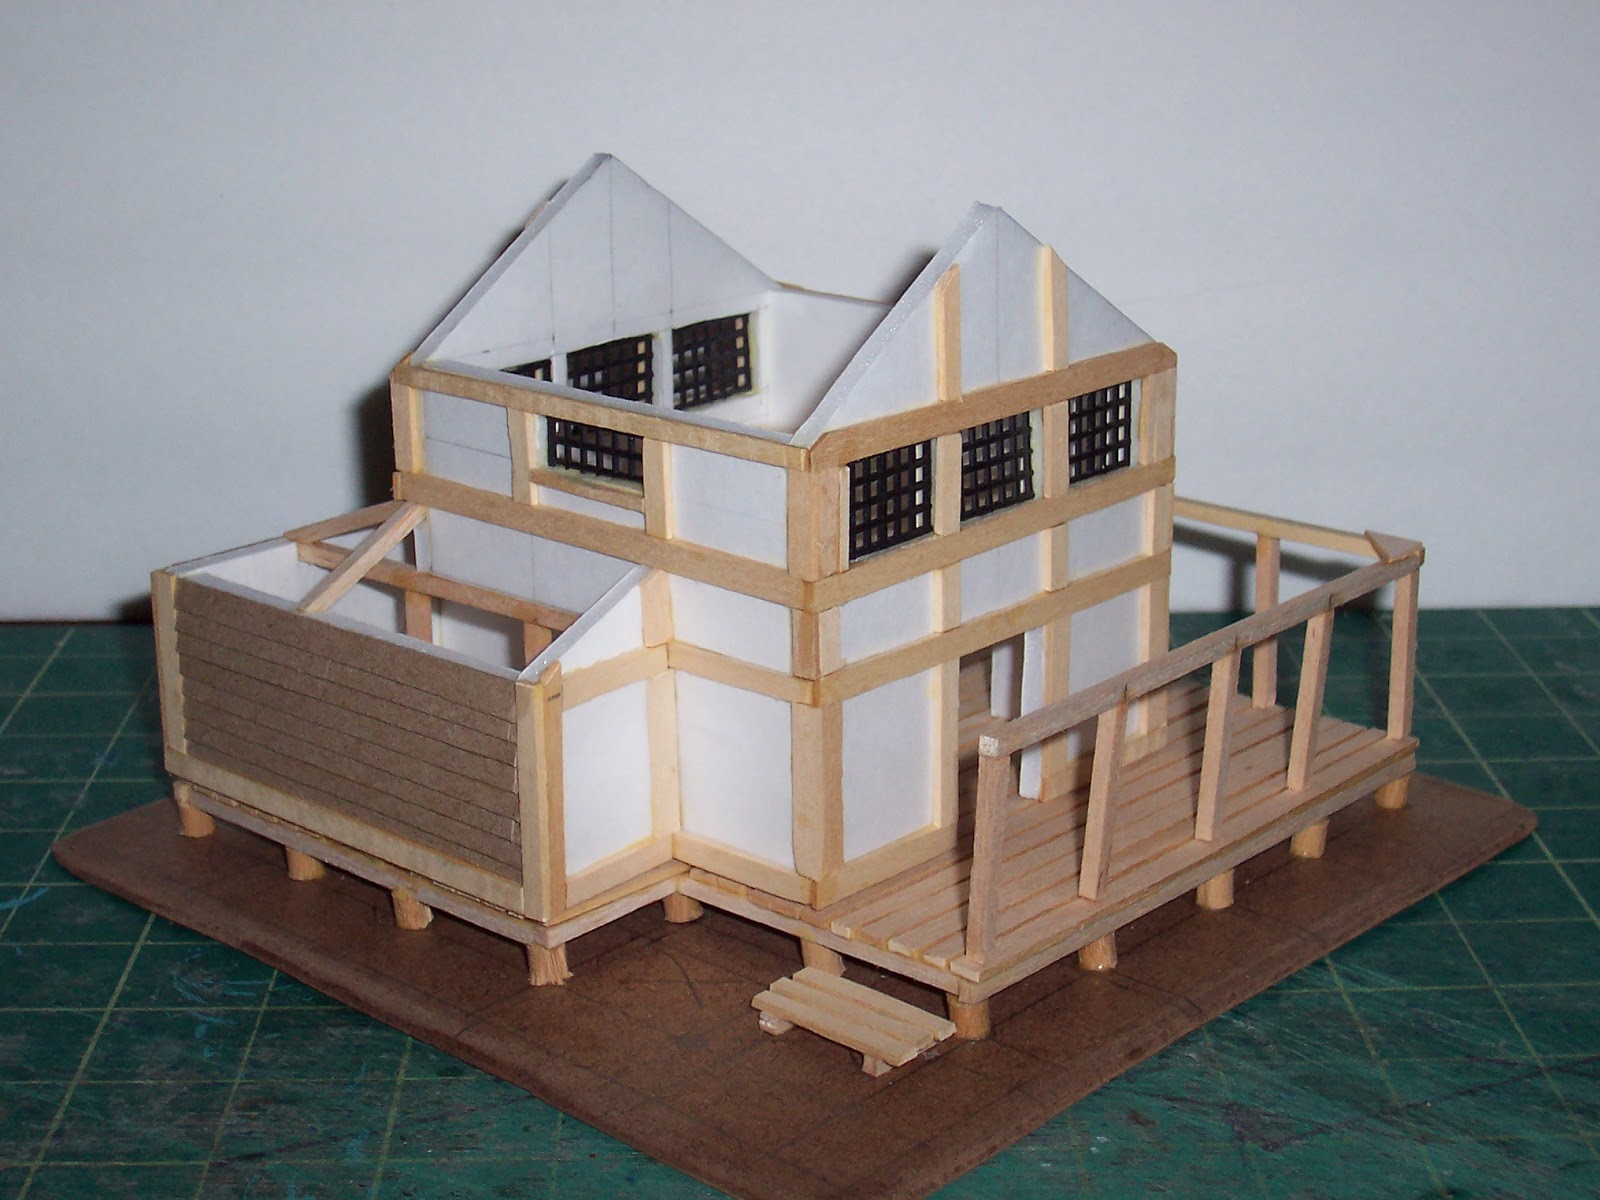
Large House
 
Most of the construction is basswood and Foamcore board.  the base is made from 1/8" mdf board with sanded/rounded edges by a router.
 
 The raised floor is done.
 
 The walls are cut and in position.
 
 The trim is proceeding and the porch wood columns and beams are built.
 
The wood siding is added in places for a variety of texture. The white portions will be plastered. 
 
 
Shinto Shrine/Priest Quarters
 
The columns and beams are in place. 
 
The wood floor is done and a ladder is built.  

The Shinto Shrine Entry is built.  


Barn

 The wall frame is mostly scrap basswood.  Next up is to add the wood siding and the roof.


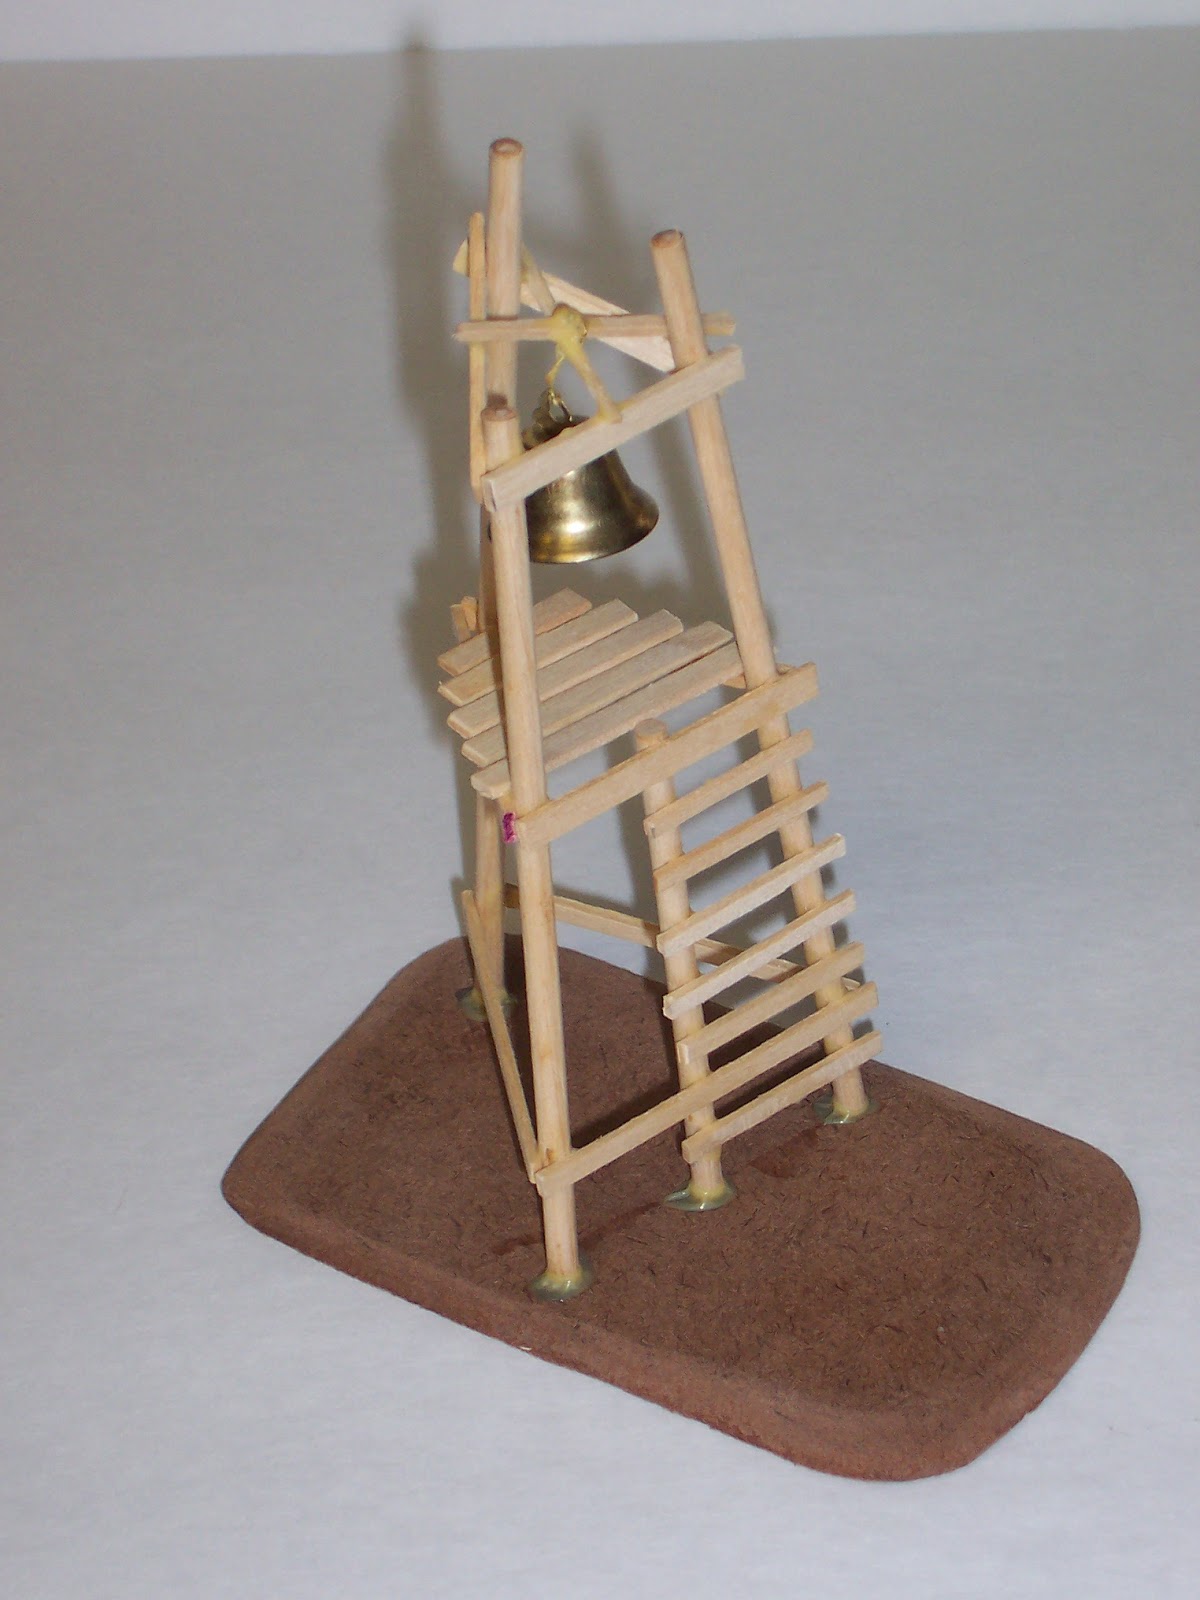
Bell Tower

The tower is finished, again, out of scrap bass wood. the three main columns are left over chopsticks from the local Chinese take-out.  (A good use for bamboo.)  It will get used more throughout the project.

The bell is a piece left-over from a ruined Christmas ornament. It actually can ring.

...to be continued in Part 2. (coming soon!)

Wednesday, December 26, 2012

28mm Samurai Miniatures

Here's some pics of what's left of my current Samurai Clan.
 
Our local gaming group each had a clan of figures and painted them in 'sports team' colors.  I chose the red/black scheme and these were my Samurai Bulls.
 
 
Most of my custom Japanese Terrain/buildings was left behind in Tallahassee when I left.  The wooden gate is all I have left of the walled compound.

6mm Star Wars "Battle of Hoth"

Here's some pics of my 6mm Battle of Hoth miniatures. I use a home-brew set of rules, but also use the WEG (West End Games) edition of 'Battle of Hoth".

The AT-AT's are Ertyl Models. Each model also comes with 2 snowspeeders and a Rebel Golan Turret.  The Shield Generator in the lower right is custom made. The Snowspeeders have a hole drilled through them to slide up and down on the wire, mounted to a metal washer and nut. A small piece of foam below the speeder keeps it at the desired height.

The Rebel Hoth troopers are modified 6mm Epic Eldar, with their cone-shaped heads re-sculpted (a nip and tuck here and there) to resemble the Rebel Hoth 'Kepi'.   

The Imperial Snowtroopers are also modified 6mm Epic Eldar.  Again, with the heads re-shaped to resemble Imperial troops.

I needed a 'downed' rebel pilot or a few, so I converted some more epic.  

In addition to the snowspeeder models that came with the walkers, I also have the Micromachine Snowspeeders which are identical in size.
 
For additional Rebel and Imperial troops, you can also find them in the Rebel Transport/Echo Base model from Ertyl. It also comes with a model of the Rebel Transport and a Millenium Falcon. 
 

10mm Battle of Islandlwana

I've been a little lax lately, so I need to post some pics of past games.

Here's a few pics from a 2009 game of the "Battle of Islandlwana" with my 10mm Colonial/Zulu miniatures.
 Here's the column of British troops marching along.
 
A closer look at the 10mm troops. 

Here, the battle unfolds as the British engage the Zulus on several fronts in order to protect the wagons & supplies. 

The "spread out" British line is proving not to be much of a match for the zulu impis.

Wednesday, November 7, 2012

Celebrating 25,000+ views

In Celebration of 25,000+ views of my gaming blog, I found these pictures of a team I need to have miniatures for to 'flesh out' my Bloodbowl teams.  Enjoy.

Now, That's a team! Yes, it's soccer (football), but we'll teach them to throw and catch a pigskin. 

My New Quarterback.

I think she's supposed to be the new halfback? (T-back?)  

Gives a new meaning to excessive celebrating after the touchdown?  
No such thin g in my rulebook.

Ooh, looks like a roughing call to me.  Maybe have to give a penalty there?
 
OK, now bring on the miniatures and hit the showers.