I set this up so that I can ramble on about my lead (and plastic) mountain, my endless gaming, miniature, and terrain projects, and other

insights into various games.


You'll find lots of 'pretty pictures', various modeling techniques, and hopefully some inspiration for your own lead pile. You're bound to

find something amongst my games and photos that interests you.


Sit back, open a cold one, and enjoy.


If you need something, feel free to contact me at: dglennjr at yah00 dot com


Showing posts with label Johnny Reb. Show all posts

Thursday, January 12, 2012

Turning a $1 hummingbird feeder into a 15mm ACW Balloon and UFO Saucer

OK, so I found this hummingbird feeder for $1 at the "Dollar Tree" and the light bulb over my head clicked. (no pun intended, see below)  It's just the thing I was looking for to make a 15mm ACW observation balloon.

 Here's what the hummingbird feeder looks like.  I think it's supposed to look like a light bulb, complete with fake wire fillament? I don't know what a feeder has to do with light bulbs, but oh well?

 Here it is, taken apart into it's main components.  The two figures shown for scale are a 28mm and 15mm figure. I shouldn't have to say the smaller one is on the right, but I will anyways to avoid confusion.

 Now you see what I see.  I'll trim the tab off the top, sand down the mold line, and then it's ready for paint.
(15mm figure shown for scale.)  Add the netting over the balloon (Made from gauze bandage stretched out), some thread for the rope lines and build a basket for under the ballon. I'll mount it to a solid based with wire that will look like the support lines below, or onto a wood dowl.  I haven't decided yet.

 I already have this kit, unbuilt.  It's approximately 25mm-28mm in scale and will be used with my 28mm ACW miniatures when put together.

 A picture of the actual 'Intrepid'.

 Here's the basket and tethers below, keeping the balloon attached to the ground. One of the cables coming from the basket is for communication so that the guy (aeronaught) in the balloon can send messages about what he sees. I.E.: Enemy troop movements and strengths.
 Here's the process for inflation.  The generators on the left combine chemicals to create the hydrogen used to inflate the balloon.

 Here's another pic.  The generators on the left are mounted on wagon chassis'.

Don't forget, the first aircraft carrier was used during the ACW, not WWI.   That is the coal barge 'George Washington Parke Curtis' turned into a flattop.  

Now, onto part II of this project...

 
here are the remnants of the base of the hummingbird feeder.  Do you see what I see?


Yep!  I'm seeing flying saucer/UFO potential too, in a variety of scales.  "Waste not, want not!"  In a smaller scale, I could also see this being made into a space station for fleet scale starships.

(1) For this UFO project, I can see adding a clear half globe on top (part of a gumball machine, dispensable plastic 'egg'.  You must know what I'm talking about?) 

(2) I'll add some sort of round, flat piece of clear plastic over the 4 holes for windows/port holes.

(3) I can see it being painted silver or grey.

(4) I can see gluing those small fake jewels around the outside rim to represent multi-colored UFO Lights.

(5) I'd build some landing gear from bits and wire for the bottom.

Lastly, the yellow flowers will end up being glued to a base with other plastic greenery added for some 'alien' foliage or just tossed into the bits box.  You be the judge.

Tuesday, December 27, 2011

15mm ACW: Battle while on the march to Bull Run

After reading about this battle that happened on the way to Bull Run (second I think?), I had to run one and finally got to do it.  The Scenario starts with a Union Division marching down a road on the way to Bull Run.  Mistake #1 is that they did not deploy flankers as they were in a hurry.  When the army got to a certain spot, with woods about 200-400 feet from the road, the hidden Confederate forces unleashed a ferocious fire of infantry rifles and artillery upon the flank of the road column. When I read that in the book, I just cringed at the thought; "..a surprise, first fire, flank shot, into a road column, at normal to close range."  The Union forces, crumbled at first, licked their wounds, and managed to deploy and chase off the Rebel forces in order to continue their march.

Here's the game:

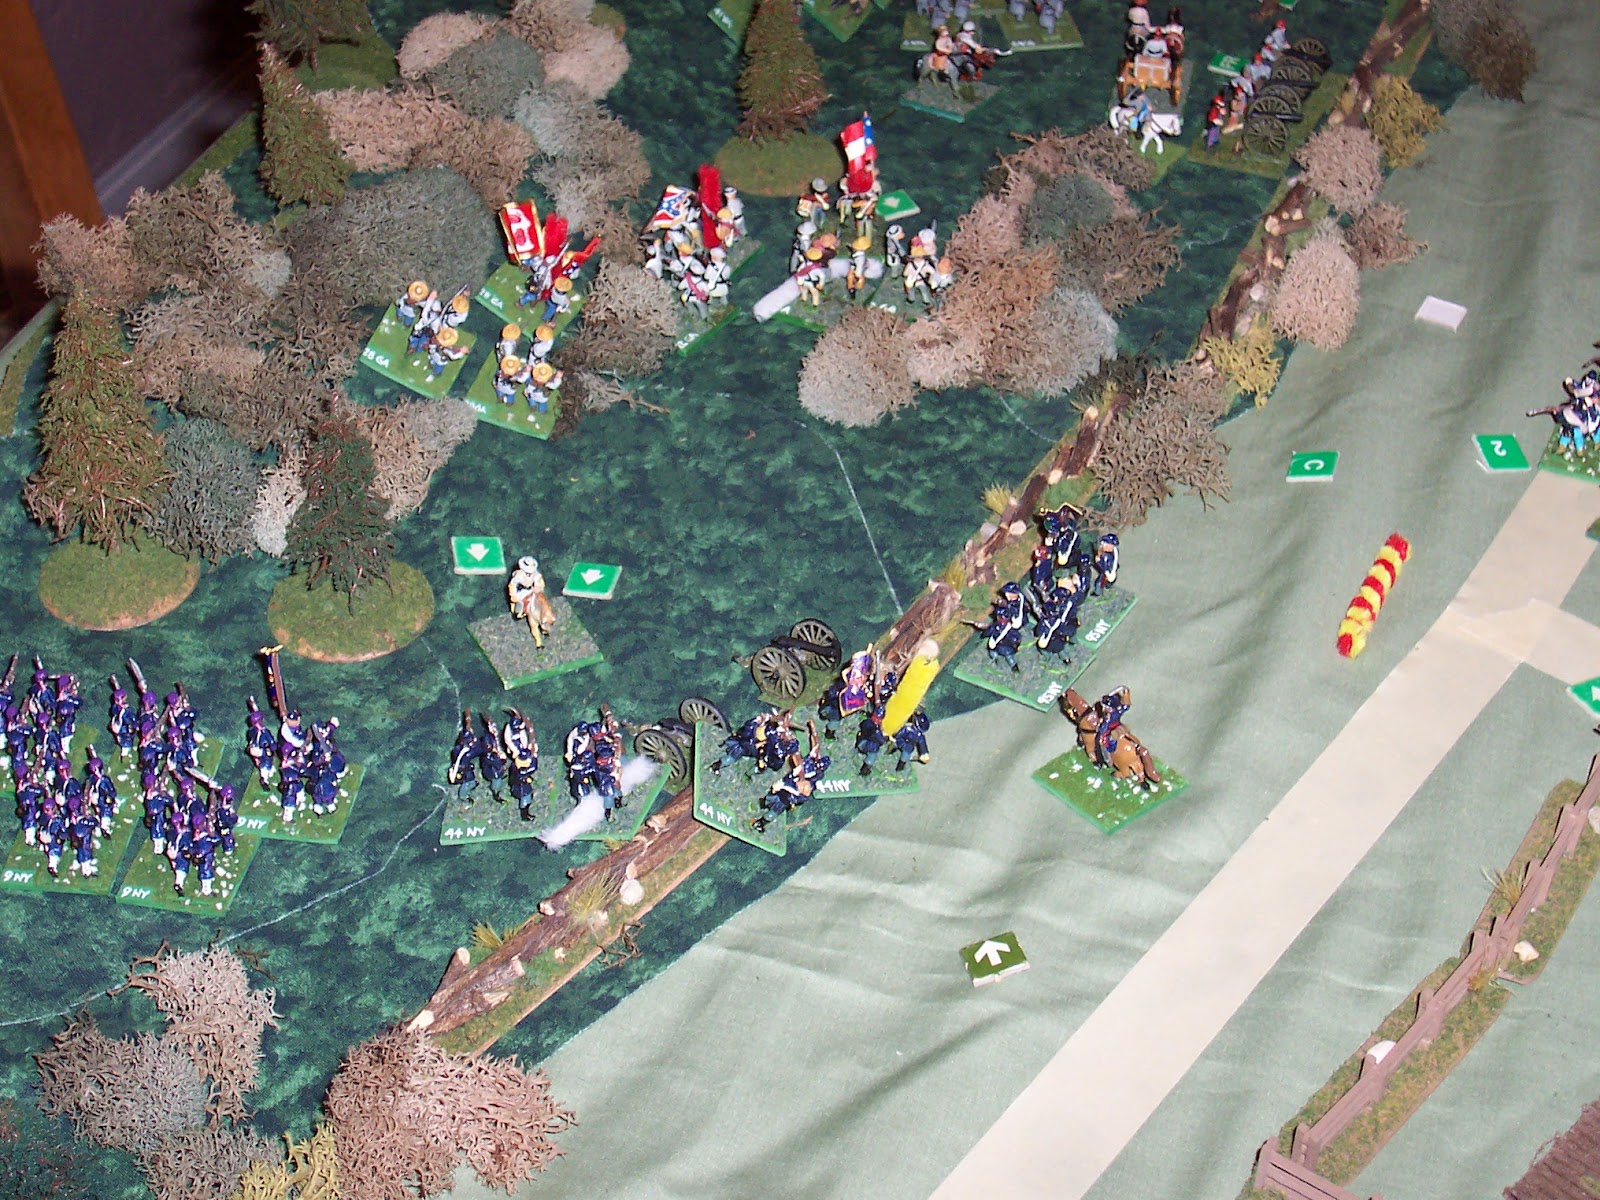
 Here's the aftermath on about turn 2, after the surprise first fire by the rebels.  I wish I had gotten a picture of the original setup. Note the empty holes on the road where there are not troops.  One noteworthy action of valor is the Union artillery stand, towards the top of the photo and to the left of the road.  That artillery unit lost 2/3 of it's men in the opening volley, successfully made all of it's morale rolls, unlimbered it's remaining gun, and began to fire double-cannister at the advancing Confederate unit.  Unfortunatley for the rebel force, this was the beginning of really good Union die rolls and really bad die rolls for the Confederacy.  

 There 'was' a continuous line of soldiers on the road when the game started. The fire was quite effective to the center of the Union Column, marginal effects to the head of the column, and almost no effect to the rear of the column.

 Several units in the Union center either routed or were removed/dispersed on the spot due to the carnage inflicted. The surviving lead Union elements (to the right) were able to easily deploy in line and find a stone wall for protection.  The remaining units in the center attempt to regroup and take cover among the wood fences.

 The lone Union General turning around and exclaiming, "Hey, where'd all you guy go?"

 The rear Union units successfully deployed and gave a good fire into the Confederate right flank.  The bad Rebel die rolls continued as several morale rolls of snake eyes caused most of the right flank to vanish.  The Union units moved quickly to continue the roll up of the flank.  The Union battery was able to limber up and move closer to plug the holes in the center of the Union line, further to the right.

Another view of at least 5 routing CSA infantry units and 2 stands of artillery crew from the Rebel right flank.

After the "Great Rebel Rout", the reformed Union troops pushed the Confederate troops furhter into the woods until they could continue their line of march towards Bull Run.

15mm ACW: Battle of Cross Keys, June 8, 1862

Here are some pics from the game that I ran of the Battle of Cross Keys, June 8, 1862.  Some of the pictures are of the full battlefield (5'x8') and a couple are from a 1/2 game where I only set up half of the field, with some restrictions.  That scenario involved the Confederate right and the Union left.

Here on the Confederate Right, the Union made the mistake of letting the rebels take the high ground and the forest in the center of the photo. 

The rebels are massed and waiting for the attack Union attack.  Skirmishers move up towards the Confederate line.  

 The Virgina Boys (CSA) are well formed and waiting for the approaching Union troops.  Note the rebel artillery behind the fence. Many Union troops will die crossing the fences and trying to come across the field.

Here's a picture of the whole 5'x8' battlefield.  The confederate line stretches from the left side of the hill/forest terrain all the way to the far right corner. The Union enters from the left side of the table. The town of Cross Keys is just out of the picture at the lower left. 

Paper Building: 15mm ACW 2-Story House

Here's another paper building that I created for my 15mm ACW games.  It can be built as a stone or brick house, or both. Simply add some colored pencil, paint and/or marker to complete the model.  The model is also appropriate for other American games such as the AWI. 

Paper Building: 15mm ACW Gettysburg Lutheran Seminary

Here's a paper building that I created and am most proud of.  I actually drew it from a copy of scaled architectural plans supplied to me directly from the staff at the Gettysburg Lutheran Seminary. (Thank you) Enjoy building it.

These are the photos of a completed model, on it's own base and scenery added.


Monday, December 26, 2011

15mm ACW: Battle of Little Rock, Arkansas

This was a fun recreation of the Battle of Little Rock, Arkansas, Sept 10, 1863. Unfortunately for the Rebels, history repeated itself.

 The Union army crosses the river and begins to deploy in two columns as they head north towards Little Rock, Arkansas, between the river and the bayous.

 That's a custom made pontoon bridge that comes apart into sections.
It was relatively simple to make in an evening.

 The Confederate forces send out troops to head off the Union advance before getting to the City's defensive positions.

 The Union is well formed up and ready to fight. The left flank has push ahead past the bayou and forward of the Union right. Union artillery made up of 12 pound napoleons and 3" rifles has set up in the middle of the field, ready to enfilade some approaching rebel troops at close range.

The Union is putting up a withering fire on the extreme right, routing a confederate artillery battery and shaking the confidence of the adjacent troops. Union Infantry is piling into the center in good order.

 
Confederate Artillery deployed on the left and in the center is checking the movement of the Union advance.  

The Rebel infantry in the corn field has found itself in a precarious position.  As the Union infantry pushes on it's right, Union artillery is putting a withering fire into the flanks of the 'Corn-federates'.  They're gonna need buckets to catch all this lead in the cornfield. Eventually, the single Confederate battery in front of the cornfield would be silenced, and the infantry would be forced back towards their own lines.  

The Union manages to deploy an artillery battery on the extreme right, protected by the river and lots of infantry support. This move would prove to be fatal to the confederate troops directly to the front, and cause them to rout down the road at a brisk pace.  


15mm ACW: Bermuda Hundred

Here was an abridge scenario of the Peninsula Campaign and the Bermuda Hundred, Virginia, May 1864.

An overview of the table. The Union entered on the left side of the table.  Rebel forces started at the far right corner along the railroad line and the other Rebels were stations at the bottom of the table, defending a redoubt.

 
Here's a better look at the redoubt between the river and the road. 
Note: The redoubt pieces are made from sections of regular curved molding, about 1 1/4" wide and 3/8" tall.  The inside of the molding is covered with three rows/layers of 1/8" diam. wood dowel, cut to fit the length and reinforced at each end with a 3/8" tall vertical dowel support.

The Union forces, once on the board, had to split and attempt an attack both ways.  Some units were assigned to attack the redoubt, while others were needed to head the opposite direction to fend off the approaching Confederate troops.

15mm ACW: Defend The Train Station

Here was a generic scenario where a Union force is attempting to hold onto and defend a rail station and the rail line. The Rebels would like to break up this rail link and prevent Union supplies from reaching the battlefield.
The Union troops are having a hard time holding their position and trying not to have their camps overrun.

 The Rebels are making a good charge into Union troops already softened up by Confederate artillery.  Several Union units have already routed over the bridge and heading away as fast as possible.

The Rebel yell can be heard through the wheat field and beyond.  Note: you can see several different techniques and materials that I use for fields.  (Lower left: Carpet sample.  Lower right, Green corn: grass/floor/welcome mat.  Center, Rows of dirt: Icky Brown Corduroy material covered with glue and tan flocking on the 'ridges'.  Back, Center: Wheat field from another grass/welcome mat.)

Sunday, December 25, 2011

A 15mm ACW meeting engagement

I like generic/ficticious scenarios so that the game is based more on tactics rather than gaming the historical aspect of the battle.

 An overview of the board.  The Union on the lower left needing to cross and deploy across the bridge, and the Union on the upper left deployed in line.  The Confederate troops are entering and deploying from the right.

 The Confederates have easliy moved into a distinctive line along the road and fences.  The Union seems to be having issues coming through the cornfield and the woods to the lower right.

 The Union troops finally appear at the edge of the woods. Artillery is actively firing in the center of the lines.

 A closer look at the Union left flank.  The extreme left flank Union units would eventually force the rebvels behind the stone fence to rout out of the way, threatening the Rebel right flank.

On the Confederate left, the Rebels are making a strong push, forcing the Union to withdraw amongst intense infnatry and artillery fire.

Pickets Charge in 15mm

On our July 4th, 2009 game night, I decided to do part of the second day of Gettysburg, Pickets Charge.  I ran the game using the modified Johnny Reb 2.5 rules.

Here's a good map showing the starting positions of the troops. I had most of the regiments represented on the board, with close to 1600 miniatures on the board representing about 40,000 troops. (1:25)
 An Overview of the battlefield from the north.  Emmitsburg Road runs down the center of the table.  Note the 8th OH out in no-man's land. This table is about 4'x9'.
(Union on the left, Confederates on the right)

The beginning of Pickett's Charge.  Note, we did allow the Rebels to bring some artillery with them.

 Looking over the Union lines towards the Rebels.

 Here comes the waves of Confederate troops.

The 8th Ohio is pushed back over the road and fences by the farm. The Union forces are ready behind the stone walls.

 The Rebels make it to the road with a few artillery casualties.

 All the Union units lined up for the upcoming fight.

 The Right Wing of Pickett's charge swings into action.

 The first Rebels cross the Emmitsburg Road.

 Another view from behind the Confederate right wing.

 The Rebels stall at the road by the Trostle House, taking a few more casualties.

 The first Confederate unit to make it in front of the wall.  They would be decimated by Union fire the next turn without support.

The next assault is much more successful.  The Rebels try to assault the bloody angle and quickly find out how it got it's appropriate name.

 The following Confederate Units pour over the fences and try to make it up to the 'high water' mark by the Bloody Angle.

 Another view of the Bloody Angle.

The right wing is making it's way across the open terrain.