I set this up so that I can ramble on about my lead (and plastic) mountain, my endless gaming, miniature, and terrain projects, and other

insights into various games.


You'll find lots of 'pretty pictures', various modeling techniques, and hopefully some inspiration for your own lead pile. You're bound to

find something amongst my games and photos that interests you.


Sit back, open a cold one, and enjoy.


If you need something, feel free to contact me at: dglennjr at yah00 dot com


Showing posts with label 54mm. Show all posts

Thursday, January 12, 2012

More 54mm Urban/City Terminator Terrain

I saw a posting on TMP (http://www.theminiaturespage.com/) about a 'Dollar Tree' find: Folding Crates (Plastic) for, you guessed it, $1. They come in Red, Blue, Yellow and Green. Of course they're not going to make one in black, the color that I want.

Well, since I use milk crates for my urban buildings (see my other Terminator posts), I thought I'd give them a try. The milk crates are a little bulky, and I was looking for a way to make the urban buildings less bulky. Solution Solved!

Unfolded, the crates measure 8" wide, 12" long and 6" high. I bought a Green one, before I found out about the other colors.  The rest I bought are blue, as I thought if the paint chips, blue will be less obtrusive on the urban buildings.  I went out and bought some cans of "Krylon Fusion" black satin spray paint.  I hadn't used it before, but from everything I've heard, it was the best for adhering to plastics. I also had some cheapy grey primer from Walmart on hand for the highlighting of the crates/structures.

After the initial test of painting it black, and then spraying with the grey primer, I love the results.  Best yet is that 6 of the folded crates fit into one that is unfolded.
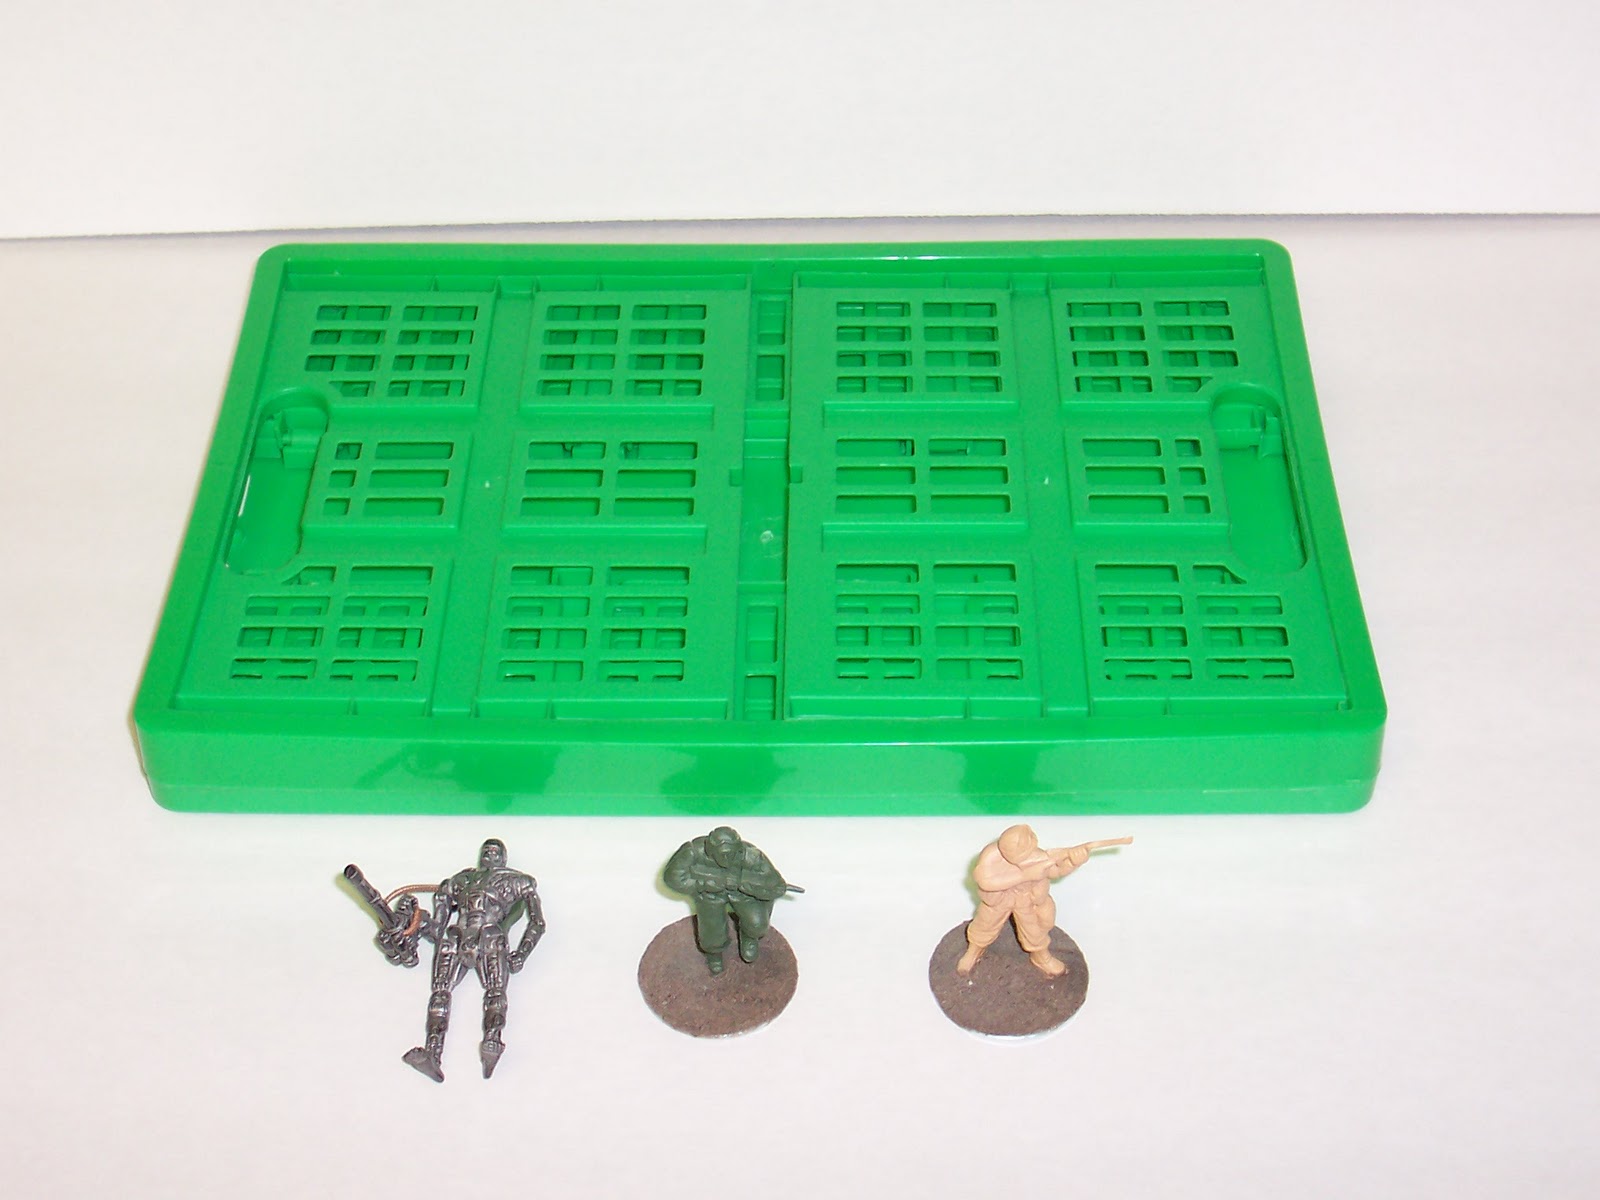
 Here's the folded crate. (miniatures shown are 54mm in scale)

 Here's the unfolded crate. I'll cut some doors into the side panels later.

 They look pretty good after getting a coat of the Krylon Fusion black satin followed by a dusting of the grey primer. Note: One can of Krylon Fusion will cover three of the crates, inside and outside. Also, I spray them in the unfolded condition.  When you fold them up, you will see parts of the crate with the original primary colors.

They're stackable too.  For smaller scaled fixtures, like 28mm, you could add interior floors to the crates.

 And there's different ways to stack them. (The black one on the right is only partially painted.  The blue will go away.)

Another way to stack them. I plan on hacking a couple of the crates up for 'ruined' looking pieces/corners of buildings. (see below) Can you see the difference between the ones that have had the grey applied and the black one waiting for the grey? It's a big difference.

Here's a typical game setup for my Terminator Salvation game.  These new buildings will fit right in. Just like the milk crates, the best part about this type of terrain is that it is cheap, and the terrain becomes the storage containers themselves.


Saturday, December 24, 2011

Terminator Salvation: Resistance at the Con, 2010

Here was some more Terminator goodness at a local gamesday, "Games of August" hosted by the Suncoast Skirmishers here in the Tampa Bay area.

In the foreground, inverted metal cans (coffee, soup, beans, etc.) are primed black and then lightly sprayed with grey for a weathered appearance.

The Resistance plans their move. The Resistance fighters were another 'great deal' .  They are 1/32nd scale action figures made by Forces of Valor.  They come packaged 4 to a set, pre-painted, and usually contains a bunch of terrain goodness such as signs, barbed wire, barricades, and etc. I've also got some modern, high quality 54mm troops (similar to plastic army men) molded in a tan color.  They're mounted, but I need to give them a paint job.

 
I've added a few more crates for this game as I had a larger table and needed more buildings.  The best thing is that I use the terrain/crates to carry the other terrain pieces in.  So, the storage containers turn into the terrain. What other game can you do that with?  

 The Hunter Tank makes it's way down the street.

The unlucky Porche.

The Terminator scans the street ahead for potential targets.

 The Resistance is on the move.

 The Hunter Tank takes some rocket fire, knocking out one of it's mini-guns.

 The Hunter Killer, swooping in to provide some aerial support, takes some serious damage from a Resistance fire rocket. The HK was forced off the board. The Resistance will take any small victory that it can get.


Terminator Salvation: The Game, in 54mm

It all starts with a trip to the dollar store.  I blame it on them. I found some Terminator Salvation action figures that were abut 54mm scale. (much smaller than the 3 3/4" action figures.) They came in two packs for $2, most having one terminator (various models) and one of the human characters. Of course I thought, "Hmmm, this would be a cheap way to do a game." I cleaned out all the stores locally and amassed quite a collection of Terminators.  In conjunction with the toy line, they also had some of the HK-tanks, a little big, but doable since there aren't any other ones out there.  The toy line also had an aerial Hunter Killer, and since they were on sale at Toy's R Us for about $6, I had to pick up a couple. (Again, my arm twisted behind my back and the gun to my head...)

For Terrain, I had seen some impressive results using plastic storage totes (aka milk crates) as sci-fi and urban buildings. Perfect! So, back to the dollar stores to get a few. I picked up some of the small ones (about 8" square) and the larger ones (about 18" square).  They're stackable, so I can make buildings of various sizes.  I cut up a couple of them, because you have to have 'wrecked' and 'ruined' building remnants from the war with the machines.

Lastly, I created a rubble box.  I filled it with all sorts of things to create 'rubble' that could be spread on the table among the buildings. Items included, but not limited to: pieces of balsa/bass wood to represent lumber, rocks, gravel, sand, concrete (crushed up), recycled tire bits (a couple of handfuls form the local playground/park), pieces of metal (screen, paper clips, etc.), electronics gears/wheels, pieces/bits of clear plastic bubble packaging (to represent broken glass), pieces of drinking straws (painted to look like pipes), and anything else I could find.  It works great.

Here's the first game that I ran:

 An overview of the battlefield.  The Resistance is tasked with rescue a couple of key Resistance figures from the HQ building.  The buildings/crates are simply painted black (if they weren't already black, though most were) and then lightly sprayed with a gray spray paint to give them a concrete/weathered look. Some of the other buildings are simply plastic baskets.

 The cargo containers were downloaded from an online site and enlarged fo rthe 54mm scale, printed, and glued to foamcore board.  The contruction vehicle is also a dollar store find. The non-functioning tank/ruin is an incomplete toy found at a thrift store for 25 cents. (It was missing the tracks.)

 Terminators heading down the street.  Usually the best way to see a Terminator, from the rear.

 Note the rubble on the ground.

 The HK Tank makes it's appearance.

"maybe it wasn't such a good idea to hide behind this SUV?"
(The HK Tank turned the SUV into 'swiss cheese' and most of the fire team was wounded.)
 The SUV is a 1:35th scale vehicle, again, a find at the dollar store.  I've acquired other ones at the flea market and thrift stores for less than a dollar, usually in the 25 to 50 cent range.

 Here comes the Terminator aerial support, as if they need it?

The Resistance fighters put up a defense.

 The Resistance has some truck mounted heavy weapons at their disposal.
(Again, dollar store finds, packaged with some green army men.)


 The Hunter Killer took some engine damage from a shoulder-fired missile.

The resistance takes down one of the T-700's.

Thursday, December 22, 2011

Sable Palm Trees & Cabbage Palms (Florida Palm Trees)

Here are some pictures showing how I made my Sable Palm Trees (State tree of Florida and South Carolina) for my Florida Terrain project. I'm planning on running skirmish level gaming (28mm) for ACW, AWI, Seminole War, Patriot War, and earlier eras (Dinosaurs), set in the State of Florida, Florida Territory or La Florida, depending on the era and ownership of the area known as Florida.

This same technique can be used to create trees and foliage for scales from 54mm on down to about 15mm.

Typical Florida palm scrub or hammock areas. 

Sabal Palmettos

 Typical Florida palm scrub or hammock areas. Cabbage or 'Sawtooth' palm in foreground

 A bunch of plastic foliage found at Michael's craft supply store.

 Individual 'branches are separated from the main stem. Notice each 'leaf' represents a palm 'frond'.

 Here, the 'fronds' have been removed from the stem.  Leave enough for the 'front' stalk.

 The Construction process: (1) Cut a wood dowel to the appropriate length. For 28mm, I used a 1/4" or 3/8" wood dowel. Use a smaller diameter for smaller scales and a larger diameter for larger scales. (duh!) (2) Wrap the dowel in masking tape, starting at the base and working upwards to create the palm 'rings'. (3) Glue (I used hot glue) a wood bead to the top. (4) Start gluing and layering the palm fronds, larger to smaller, from the bottom to the top.  The lower fonds will represent the dead/flapping palm fronds. (sorry, they didn't have landscapers back then that regularly removed the dead fronds.)

 (5) I spray the top 'foliage' with a forest green spray paint. (6) I dry brush the fronds with lighter greens/yellows, with the lightest colors at the top of the tree. I paint the lower fronds with browns and tans.
(7) I paint the trunk a tan color and highlight the rings. (8) Lastly, I drill holes in a 1/8" mdf base, and glue in the trees.

 (9) Finish off the base with assorted foliage and details.  Can you see the Seminoles hiding?  The other plastic plants are other pieces from various Michael's plastic plants and ferns.  You just have to find the right ones that look to scale. Think small.

 Here is some of my other 'Florida' fauna.  The plastic palms are from a Chinese distributor and can be found cheaply and easily on ebay.  They work well for understory trees, cabbage palms, and 'Sawtooth' palms. These haven't received a final paint job or highlighting, just based and flocked for a game. 

Some other foliage to represent some of the pines, cypress, bushes and ferns abundant in the Florida wilderness.